Windows
Install SNClient on Windows using the MSI package and configure its firewall and installation options.
OS-specific installation instructions are available for:
Using packages is the recommended way to install SNClient.
Find a list of supported OS distributions here.
Stable release installation packages can be found here:
You might need to expand the assets to find the download links.

During development, each code commit produces build artifacts if all tests were successful.
Usually, you should stick to the stable releases unless told otherwise or you want to test something.
Installing the development snapshot is straightforward:
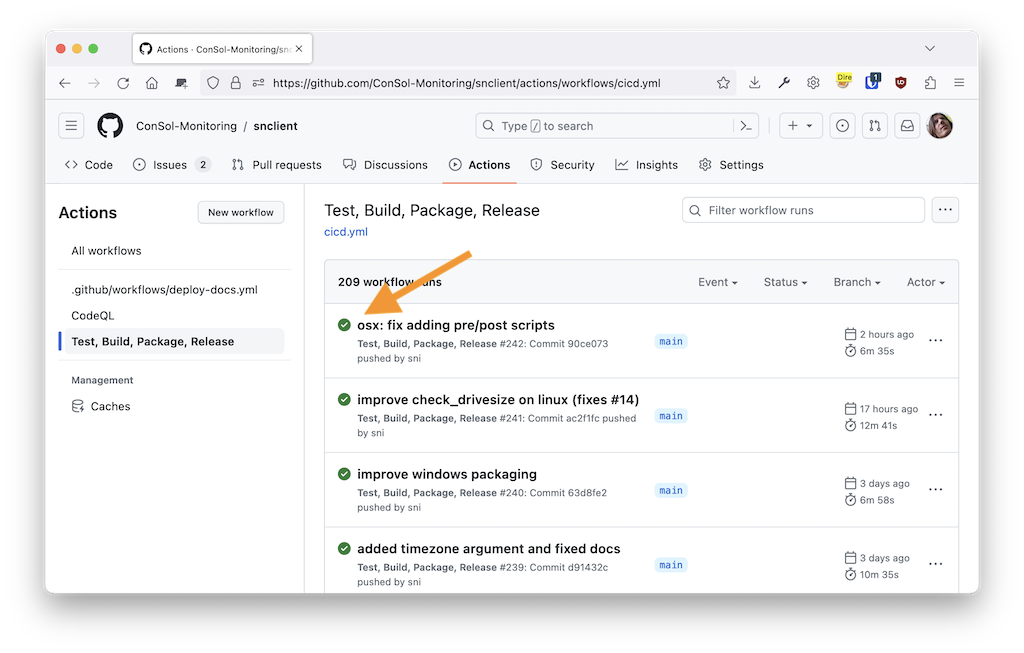
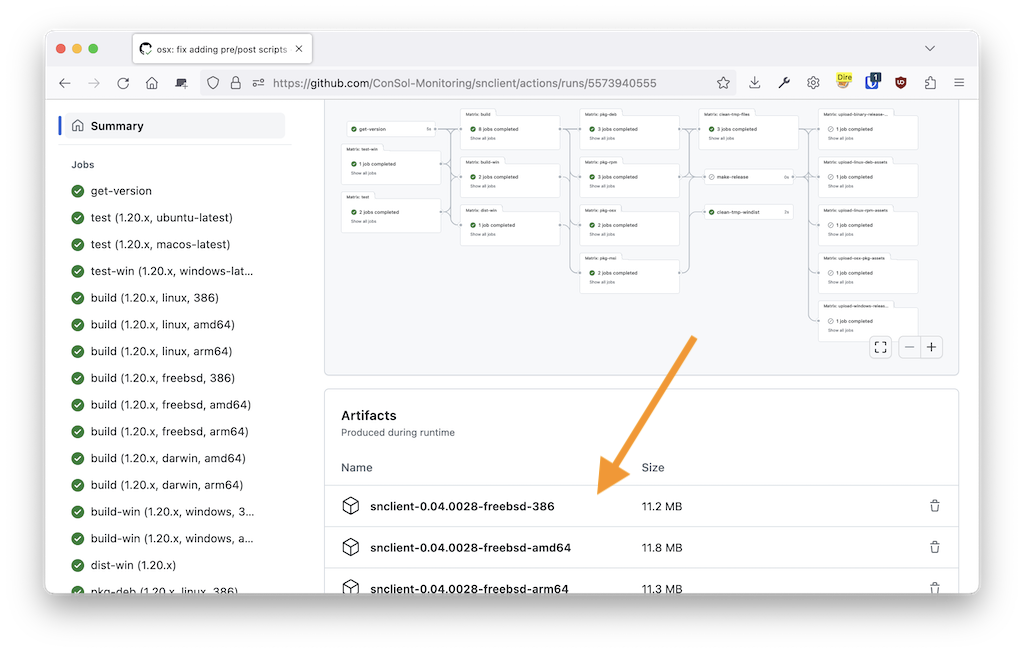
Note: In order to download the snapshot artifacts, you need a GitHub account and must be logged in.
Building SNClient from source is covered in detail here: Building from source
Install SNClient on Windows using the MSI package and configure its firewall and installation options.
Install SNClient on RHEL, Rocky Linux, and AlmaLinux from packages.
Install SNClient on Debian and Ubuntu using DEB packages.
Install SNClient from the Arch User Repository (AUR).
Install SNClient on macOS using the package installer.
Build SNClient binaries and platform packages from source.
Review supported operating systems and CPU architectures for SNClient.